Showing posts with label bathroom. Show all posts

Tuesday, October 30, 2012

A Month of Cleaning: Days 13 & 14


Upstairs Bathroom Before & After:
 I pulled these storage boxes out of the cabinet and stacked them on top to create more storage space inside the cabinet.  This helped a ton!  The items stored in them are ones we don't use frequently, so storing them up here out of the way made more sense than having them take up valuable easy-access space.


Downstairs Bathroom Before & After:
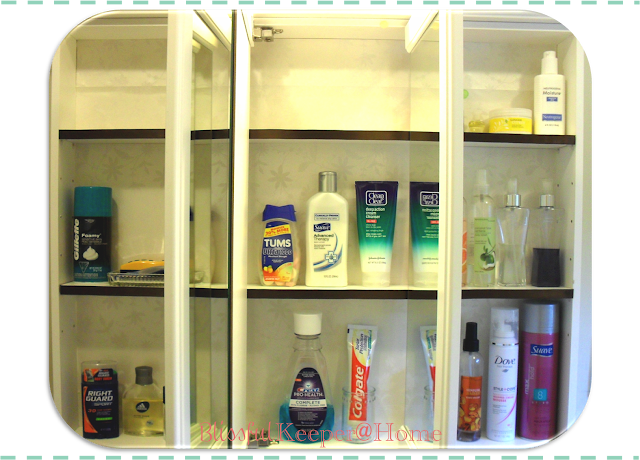
 The cabinets pictured above and below hang above my washer and dryer.
Hence all the laundry products!


Happy Cleaning!

Saturday, October 27, 2012

A Month of Cleaning: Days 11 & 12


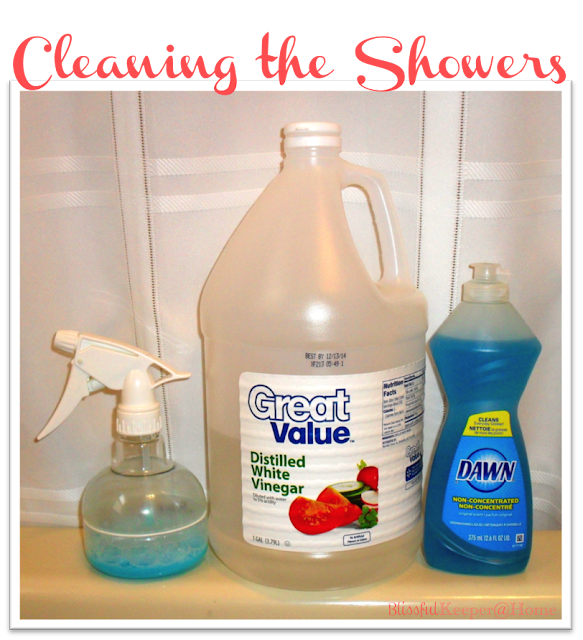
Recipe Inspiration Source:   Tub and Shower Magic

It's not perfectly spotless, and that's fine with me.  I still need to find a way to get discolorations out of caulk.  I also want to find a way to get ride of ALL the hard water deposits on the chrome fixtures.  Other than that, I'm very pleased with this process for cleaning my showers.  Next time, however, I'm going to try using Seventh Generation Dish Soap in an effort to use more natural cleaners.

Happy Cleaning!

Wednesday, October 3, 2012

A Month of Cleaning: Days 1-3


Here are the two recipes I found and used to create my own:
  1. Borax/Water Recipe
  2. DIY Grease-Cutting Floor Cleaner


Recipe Source:  Homemade Floor Cleaner


You can find all these recipe sources on my "A Month of Cleaning" Pinterest Board.  I will be pinning all my sources on this board throughout the month.

Happy Cleaning!

Friday, August 31, 2012

All Natural Homemade Cleaning Solutions

In the past several months I have made the switch from hard, hazardous chemical cleaners to gentle, non-toxic cleaners.  These are more cost-effective than store bought cleaners and I don't need to be terribly concerned about little ones getting into them.  They are easy to make, easy on my skin and eyes, and don't give me massive headaches like most other cleaners.

Here is a chart of my favorite recipes for the cleaning solutions I use most often.


Sources: 
Young House Love - Clean Up Your Act:  All Natural Homemade Cleaners
Kitchen Stewardship - Natural Kitchen Cleaners:  What's Under My Sink?
Food.com - Tub and Shower Magic


Monday, July 2, 2012

Master Bath Cabinet Facelift

Last month I decided to FINALLY give the inside of the cabinet in our master bathroom a facelift.  I had planned this project a while back, but with the exhaustion of early pregnancy taking over my life, I hadn't worked up the motivation to actually DO the project.  Around the middle of June (9-10 weeks into my pregnancy) I was starting to have energy again, YES!

Plain white interior...not so pretty.

Here's my step-be-step process for beautifying the interior of our bathroom cabinet.

1. Gather materials:
  • Self-adhesive wrapping paper of choice, make sure you have enough to cover the entire surface you plan to cover, I just barely had enough!  I used a wedding themed paper from Hallmark.
  • Spray adhesive - I used Scotch
  • Craft glue
  • Ribbon - approximately same width as shelf fronts
  • Utility knife
  • Scissors
  • Screw driver
  • Cleaner of choice - I used a 1 part water, 1 part vinegar solution
2.  Empty the cabinet, remove the doors and take out the shelves.

3.  Place the paper on the back side of the cabinet.  Make sure it covers the entire back and try to get it as smooth as possible.
4.  Use the utility knife to trim the excess paper.  For a nice, clean cut make sure you are using a sharp blade.  If the blade is dull, it will cause the paper to rip.  Not what you want.
5.  Leaving the paper in, peel back one side and spray the adhesive on the back of the cabinet.  I would recommend covering your vanity to protect it from over-spray.  I worked from left to right.  Once I had the far left side glued down, I peeled the paper back towards the left and began gluing from there.  Be sure to smooth out your paper as you work, otherwise you will have bubbles and wrinkles.

Nice, smooth, pretty papered back.

Next we move onto the shelves!
6.  Cut to pieces of ribbon to match the length of your shelves.  I chose to cut mine a little long and trimmed closer after it was glued down.
7.  Apply craft glue to the edge of the shelf that will be facing out.  I chose to apply it in a zig-zag pattern and then smoothed it with my finger to have an even, thin coat.

8.  Carefully place the ribbon on the shelf edge with glue.  Again, I worked from left to right.  My ribbon was just a hair or two wider than my shelf edge, so I had to make sure it was even across the top, and only hung over on the bottom.
9.   Repeat steps 7 and 8 with second shelf.

10.  Place shelves in cabinet and then hang the doors.

11.  Fill with health and beauty products as desired.

What a pretty cabinet!

Friday, June 8, 2012

Master Bath

When my husband and I registered for our wedding, he insisted on a purple bathroom.  He'd always dreamed of having a purple bathroom.  And so...a purple bathroom we had!  Here is what our bath looked like in our apartment.


 My sweet Hubby has given me more "free reign" in decorating our new home and I have no intention of painting our bathroom walls purple!  In fact, we haven't done any painting in our new house.  We only lived in our apartment for about 3 months before we found our house, and only two more months before we actually moved.  In those first short 3 months we had only finished painting the living room and started painting the bathroom.  Our landlord gave us the option to finish painting with the paint we had already purchased, instead of re-painting the work we had already done.  We ended up making a few trips back to the apt to finish painting after we moved into our house.  Thus we were not any too eager to start another painting project.  A year later and we still haven't done any painting.

Here is what our master bath looks like now.


Bathroom To-dos:
  1. Hang double towel rod.
  2. Hang toilet paper holder.
  3. Hang towel ring by sink.
  4. Add wall shelf above toilet.
  5. Re-paint trim and walls.
  6. Instal new shower walls (They aren't sealed which led to a horrendous mold problem.  We haven't used this shower since mid-March.)
  7. Instal new faucet.
  8. Instal new shower fixtures.
  9. Instal new lighting.
  10. Buy new bath mats.
  11. Hang hook for towel next to shower.
  12. Hang new matching towel ring.